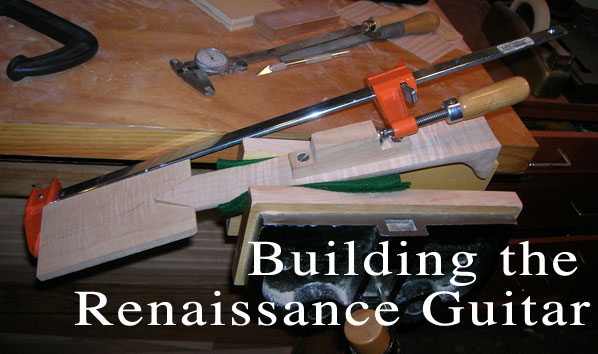
Building a Renaissance Guitar
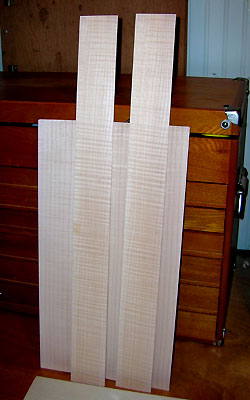 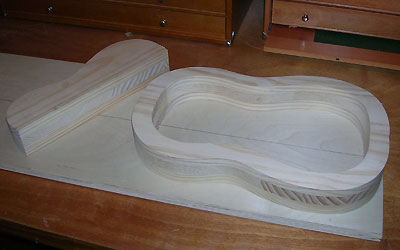 I prefer maple with a strong figure. Ater making a scale drawing, I cut and thin the wood to the dimensions needed and build a form. The instrument will be constructed inside this form. I prefer maple with a strong figure. Ater making a scale drawing, I cut and thin the wood to the dimensions needed and build a form. The instrument will be constructed inside this form.
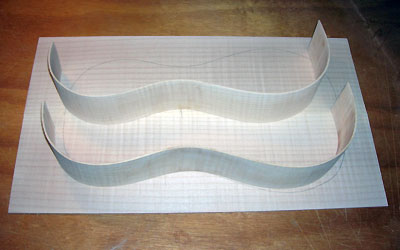 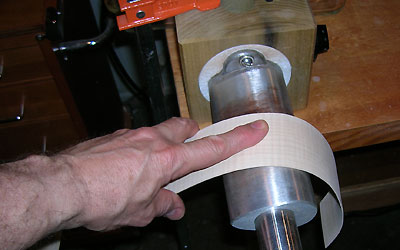 The thin sides are bent over a bending iron, a piece of aluminum pipe with a heating element inside. After thirty years, I finally broke down and bought a commercial heating iron. It is regulated by an internal thermostat. A little moisture on the wood carries the heat into the cells and permanently bends it into the proper curve. The wood quickly dries out again as it is bent. The thin sides are bent over a bending iron, a piece of aluminum pipe with a heating element inside. After thirty years, I finally broke down and bought a commercial heating iron. It is regulated by an internal thermostat. A little moisture on the wood carries the heat into the cells and permanently bends it into the proper curve. The wood quickly dries out again as it is bent.
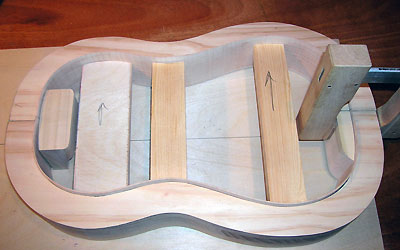 The sides are in the mold and end blocks have been glued in place. The mold and the wooden bars (which are removed later) keep the instrument in the exact shape that I want. The sides are in the mold and end blocks have been glued in place. The mold and the wooden bars (which are removed later) keep the instrument in the exact shape that I want.
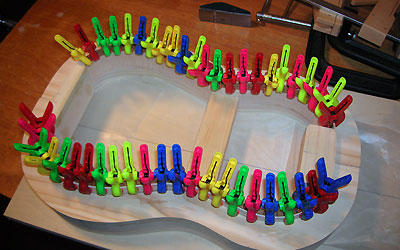 Thin maple bindings are glued on the edge of each rib, to increase the gluing area for the back. Thin maple bindings are glued on the edge of each rib, to increase the gluing area for the back.
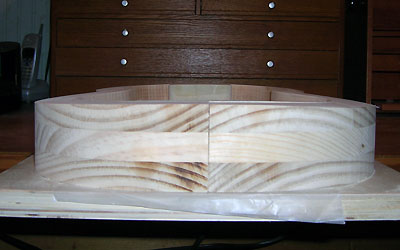 An end view of the body mold shows the curvature that the back will acquire after being glued on. A perfectly flat back will look concave after the instrument is varnished. It may even become concave with time. A back that is slightly arched looks more or less flat after being varnished, and is unlikely to ever sink in or become concave. An end view of the body mold shows the curvature that the back will acquire after being glued on. A perfectly flat back will look concave after the instrument is varnished. It may even become concave with time. A back that is slightly arched looks more or less flat after being varnished, and is unlikely to ever sink in or become concave.
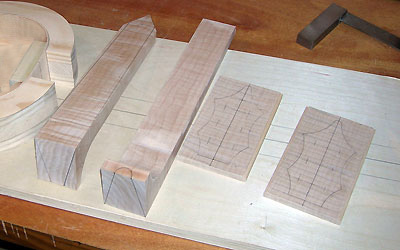 Two necks and two pegboxes roughed out. I prefer to build two insruments at once. Two necks and two pegboxes roughed out. I prefer to build two insruments at once.
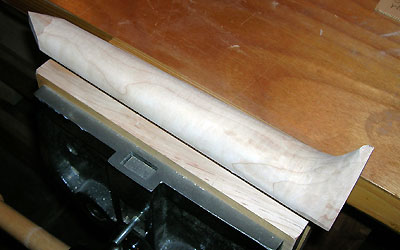 The neck block has been carved to shape. The neck block has been carved to shape.
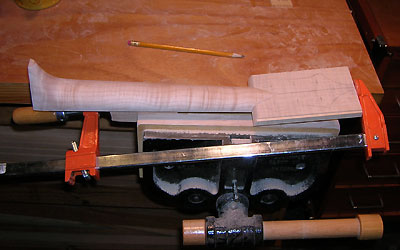 The pegbox is glued on in the traditional 17th-century manner. A very difficult joint, but very attractive in the finished instrument. The pegbox is glued on in the traditional 17th-century manner. A very difficult joint, but very attractive in the finished instrument.
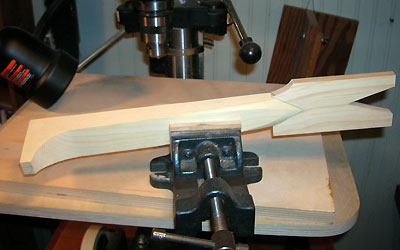 The secret to getting a beautiful pegbox-neck joint: make a dummy neck and pegbox from soft wood to determine the correct angles. The secret to getting a beautiful pegbox-neck joint: make a dummy neck and pegbox from soft wood to determine the correct angles.
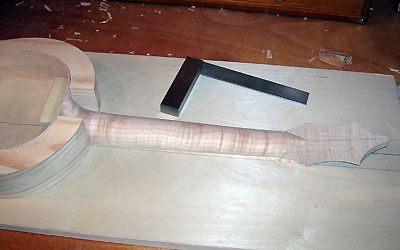 The neck glued onto the body block, using a traditional 16th-17th century butt joint. The old makers drove a nail or two through the block into the neck to keep it from coming loose. X-rays of Stradivarius violins show that he used one or more iron nails to hold his necks on. I cheat and use a big wood screw. The neck glued onto the body block, using a traditional 16th-17th century butt joint. The old makers drove a nail or two through the block into the neck to keep it from coming loose. X-rays of Stradivarius violins show that he used one or more iron nails to hold his necks on. I cheat and use a big wood screw.
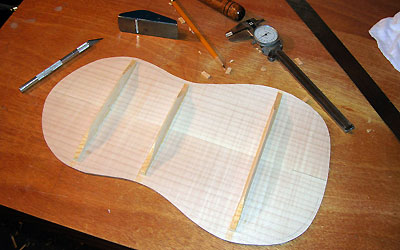 The back with three braces. The braces are carved with a curve to match the curve on the body mold. It's important to give the back a slight arch, so it is slightly convex. Owing to an optical illusion, if you make the back perfectly flat, it will appear a bit concave after it is varnished. By making it slightly convex, it will appear flat. Most commercial guitars are made this way. Ukuleles often are not. The back with three braces. The braces are carved with a curve to match the curve on the body mold. It's important to give the back a slight arch, so it is slightly convex. Owing to an optical illusion, if you make the back perfectly flat, it will appear a bit concave after it is varnished. By making it slightly convex, it will appear flat. Most commercial guitars are made this way. Ukuleles often are not.
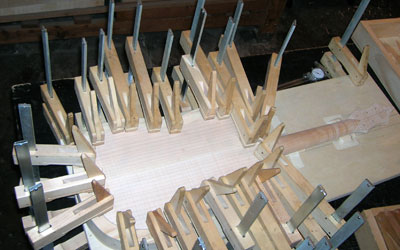 The back being clamped on with light pressure. Too much pressure can result in a "starved joint", meaning that too much glue has been squeezed out and the joint will eventually fail. The back being clamped on with light pressure. Too much pressure can result in a "starved joint", meaning that too much glue has been squeezed out and the joint will eventually fail.
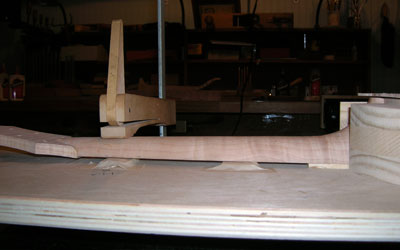 I glue on the neck with a slight backward angle. Wood shims underneath the neck help me get the exact angle I need. Then I make a wedge-shaped fingerboard, thicker near the pegbox and thinner near the body. This helps me to get a really low action, as will be explained below. I glue on the neck with a slight backward angle. Wood shims underneath the neck help me get the exact angle I need. Then I make a wedge-shaped fingerboard, thicker near the pegbox and thinner near the body. This helps me to get a really low action, as will be explained below.
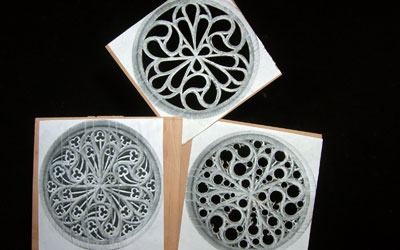 The paper rose pattern is glued to a thin sheet of pear wood. Holes are drilled through the wood to open up the spaces and remove some of the wood. A number 11 x-acto knife is used to cut the final shapes (top rose). The paper rose pattern is glued to a thin sheet of pear wood. Holes are drilled through the wood to open up the spaces and remove some of the wood. A number 11 x-acto knife is used to cut the final shapes (top rose).
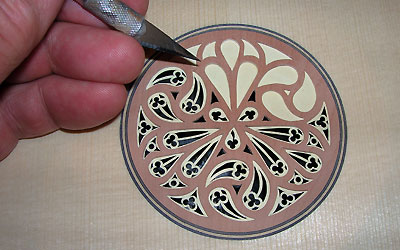 A piece of stiff parchment paper is glued onto the bottom of the single layer of pear and the secondary design carved into this paper. A piece of stiff parchment paper is glued onto the bottom of the single layer of pear and the secondary design carved into this paper.
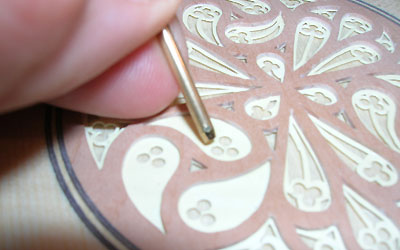 Some of the paper cutting was done with thin brass tubing. The end of the brass tube is sharpened on a stone and used to punch out the circles much more precisely than with a knife. This rosette was inspired by an historical rosette, but is not an exact copy. Some of the paper cutting was done with thin brass tubing. The end of the brass tube is sharpened on a stone and used to punch out the circles much more precisely than with a knife. This rosette was inspired by an historical rosette, but is not an exact copy.
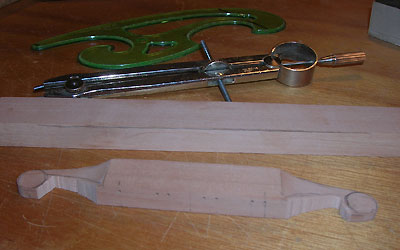 The bridge, roughed out of a piece of Swiss Pear. The bridge, roughed out of a piece of Swiss Pear.
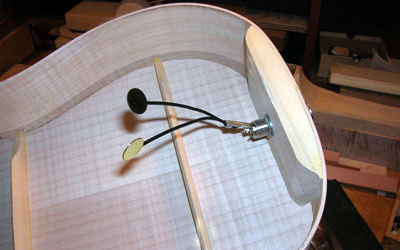 I have installed pickups because we play gigs in noisy places and we need to be heard. The two piezo-electric discs will be glued to the underside of the soundboard, near the bridge. The wires need to be kept short so they don't vibrate against the soundboard. I have installed pickups because we play gigs in noisy places and we need to be heard. The two piezo-electric discs will be glued to the underside of the soundboard, near the bridge. The wires need to be kept short so they don't vibrate against the soundboard.
UPDATE: Considerable experimentation in a variety of halls, bars, and other places has convinced me that external microphones give a more natural sound. We try to use mini-microphones clamped to each instrument. The advantage of the piezo elecric discs is convenience. You can move around the stage easier (we don't stay in our chairs when we play--we like to move around). An external microphone can pick up ambient noise and other instruments. If I am outdoors I would rather use the internal pickups. I plug right into a portable battery-powered amp and get better results than with a mic.
Obviously, there are advantages to each system. If I want the cleanest sound with the pick-ups, I plug into a small external preamp clipped on my belt. The K & K preamp has an extremely low noise circuit with bass/mid/treble/gain/volume controls right on my belt. Most mics and pick-ups are bass heavy and the lute is a treble heavy instrument. If I don't have a sound man, I will use the K & K preamp to attentuate the sound myself. It is powered with a 9-volt battery.
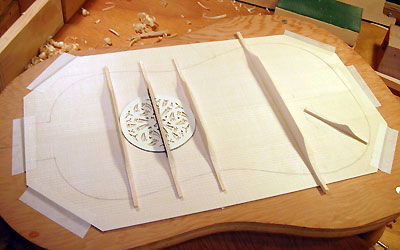 The braces on the soundboard are a greatly simplified version of lute bracing. The finished bridge has already been glued to the other side. Some makers use no braces at all or only one or two. This creates an uneven, hollow kind of sound. It may work on a soprano Ukulele, but the Renaissance guitar is more like a baritone Ukulele and needs more support both to prevent the top from caving in and to help distribute the vibrations in a way that gives an even sound with no wolf notes or dead notes. The braces on the soundboard are a greatly simplified version of lute bracing. The finished bridge has already been glued to the other side. Some makers use no braces at all or only one or two. This creates an uneven, hollow kind of sound. It may work on a soprano Ukulele, but the Renaissance guitar is more like a baritone Ukulele and needs more support both to prevent the top from caving in and to help distribute the vibrations in a way that gives an even sound with no wolf notes or dead notes.
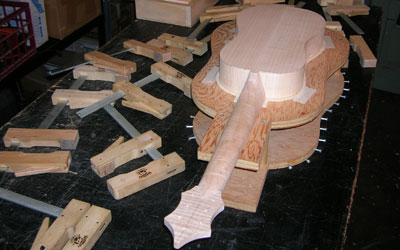 The soundboard is carefully fitted to the body and the braces trimmed to the right length. The soundboard is carefully fitted to the body and the braces trimmed to the right length.
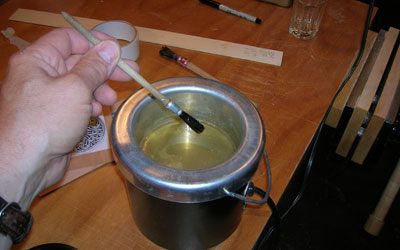 I have always used hot hide glue to glue on a soundboard. This makes it easier to remove if the instrument ever needs to be repaired. I have always used hot hide glue to glue on a soundboard. This makes it easier to remove if the instrument ever needs to be repaired.
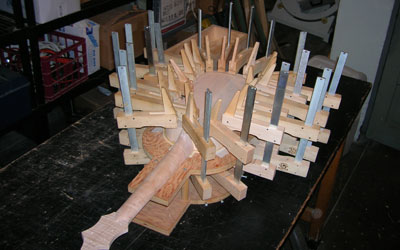 The soundboard is lightly clamped and left to dry overnight. The soundboard is lightly clamped and left to dry overnight.
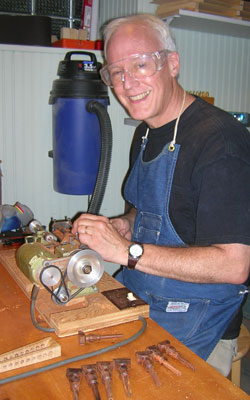 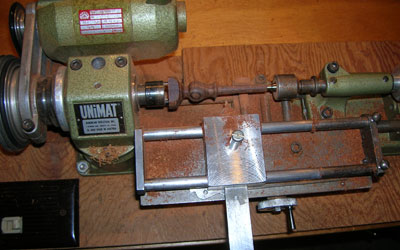 While the soundboard joint is drying, I make the pegs for the instrument. It will need seven. I tend to "zone out" when turning pegs. The task is repetitive and after thirty years I have probably made thousands of pegs on this lathe. While the soundboard joint is drying, I make the pegs for the instrument. It will need seven. I tend to "zone out" when turning pegs. The task is repetitive and after thirty years I have probably made thousands of pegs on this lathe.
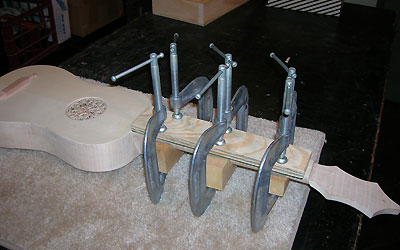 The fingerboard is clamped in place. I use a bottle of liquid hide glue to glue on the fingerboard because liquid hide glue never achieves the
bonding integrity of hot hide glue. Fingerboards may need to be removed eventually to solve action problems caused by neck movement. I always build an instrument with a future repairman in mind. Liquid hide glue makes it incredibly easy to remove the fingerboard. This is the only use I have ever found for liquid hide glue. Its use will guarantee joint failure in any other part of the instrument. The fingerboard is clamped in place. I use a bottle of liquid hide glue to glue on the fingerboard because liquid hide glue never achieves the
bonding integrity of hot hide glue. Fingerboards may need to be removed eventually to solve action problems caused by neck movement. I always build an instrument with a future repairman in mind. Liquid hide glue makes it incredibly easy to remove the fingerboard. This is the only use I have ever found for liquid hide glue. Its use will guarantee joint failure in any other part of the instrument.
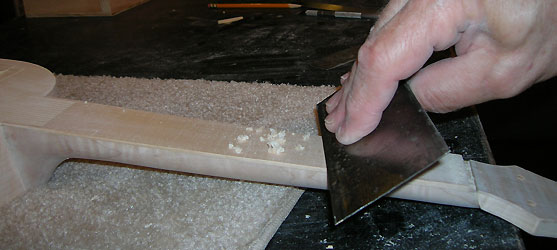 The neck, which has been left thicker near the pegbox, is scraped into a compound curve. It has a little side to side curvature to help hold the gut frets tightly, but it also has a slight concavity which echoes the shape of a plucked string. Many lute makers tie on frets of decreasing diameter to achieve the same shape. The disadvantage of a flat fingerboard with smaller and smaller frets is that the thin frets near the body won't stay very tight and tend to move around if they are too thin. By introducing the string curvature into the fingerboard, I can use frets all of the same diameter (usually .9mm) and they stay tighter all the way down the neck! The neck, which has been left thicker near the pegbox, is scraped into a compound curve. It has a little side to side curvature to help hold the gut frets tightly, but it also has a slight concavity which echoes the shape of a plucked string. Many lute makers tie on frets of decreasing diameter to achieve the same shape. The disadvantage of a flat fingerboard with smaller and smaller frets is that the thin frets near the body won't stay very tight and tend to move around if they are too thin. By introducing the string curvature into the fingerboard, I can use frets all of the same diameter (usually .9mm) and they stay tighter all the way down the neck!
A second advantage of a wedge shaped fingerboard:Because the fingerboard is thicker nearer the pegbox, if the neck eventually pulls forward from string tension, a repairman doesn't have to remove the fingerboard and replace it. He can just sand down the thick end and reset the action. Now, the neck isn't likely to pull forward on this little guitar with only seven strings, but on a lute or archlute with 12-23 strings, it is a very real possibility.
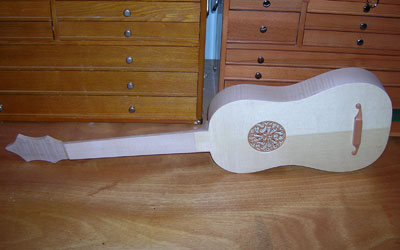 The Renaissance guitar "in the white", waiting to be varnished. The Renaissance guitar "in the white", waiting to be varnished.
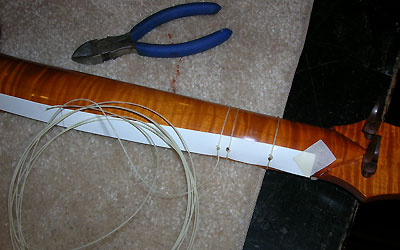 After varnishing the instrument, the frets are tied on with a piece of heavy paper taped to the neck to prevent scratching when the frets are slid into place. I tie the frets a little higher and slide them down to make them really tight. The paper is pulled out after all the frets are on and there are no scratches or indentations to spoil the appearance of the varnish on the neck. After varnishing the instrument, the frets are tied on with a piece of heavy paper taped to the neck to prevent scratching when the frets are slid into place. I tie the frets a little higher and slide them down to make them really tight. The paper is pulled out after all the frets are on and there are no scratches or indentations to spoil the appearance of the varnish on the neck.
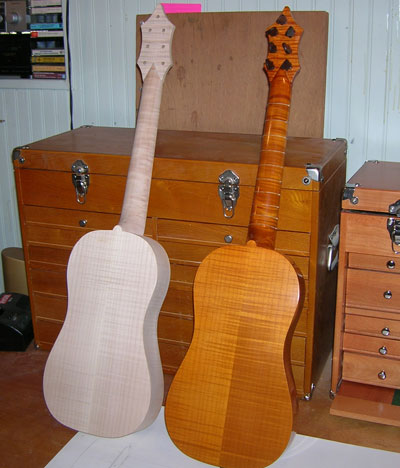 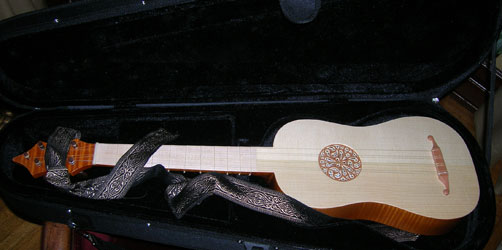 The finished Renaissance guitar next to the unfinished one. After we have played the new guitar, any improvements to tone, action, pegs, etc., will be incorporated into the second guitar. Although I have built hundreds of lutes, this is the my first Renaissance guitar. The first instrument is considered a "prototype". The finished instrument fits nicely into a Baritone Ukelele case. The finished Renaissance guitar next to the unfinished one. After we have played the new guitar, any improvements to tone, action, pegs, etc., will be incorporated into the second guitar. Although I have built hundreds of lutes, this is the my first Renaissance guitar. The first instrument is considered a "prototype". The finished instrument fits nicely into a Baritone Ukelele case.
| 
